Instead of the usual ten links, I'm posting 5 videos. These are all basic wire wrapping techniques to make useful and basic components for your jewelry.
How to wire wrap end caps (could also be used as bead caps for the right bead shape)
How to wire wrap ends on leather cord (this is the technique I use for my jewelry, I really like the way it looks)
How to wire wrap a briolette or stone
How to wire wrap a hook & loop clasp
How to make a simple wire wrapped ring (once you have the basic technique down, you can make more complex designs!)
Enjoy :)
Amber

Showing posts with label learning. Show all posts
Showing posts with label learning. Show all posts
Thursday, September 19, 2013

Monday, August 19, 2013
Photography - Reaching Nirvana
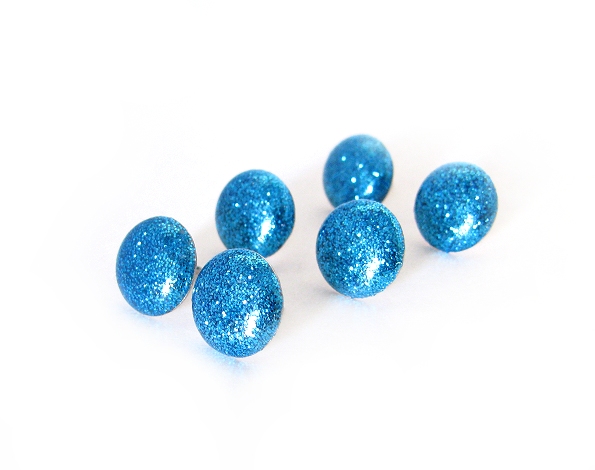
And of course, by Nirvana, I mean a white background in photos. Neither is easy, though I dare say getting a white background is easier than reaching Nirvana. Maybe, I can make the white background thing a little bit easier. That way we can all put our energy into finding Nirvana. LOL
So the first place you want to start is to mess around with settings on your camera. Fortunately, even among point-and-shoots like mine (Canon Power Shot SX110 IS), those settings are fairly standardized. Some cameras may not have some of these, if you're not sure about yours check out the manual. (or search for tutorials online for your specific camera and it's features, which will probably be clearer)
The setting I've used in the past was Indoor. I'd set it to macro, maybe bump up the light balance a bit and take dozens of pictures. Then, I'd go into my photo editing software to clean it up, and find that the backgrounds weren't quite so pretty and white as they looked on the camera screen. I've been doing this for years, and somehow I still forget on occasion that my camera screen is a little overly bright. Anyway, in using the software to edit, I would hit a point where I could either get a nice white background -or- I could have the colors actually look like the thing I had photographed. Not a fun choice!
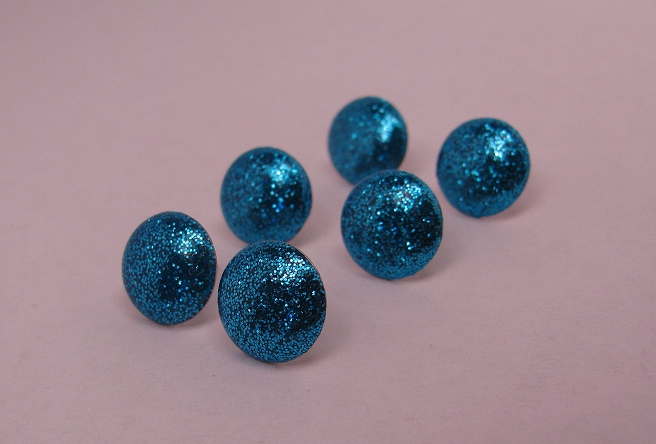
So, I decided to try the Program setting on my camera, and change the white balance setting to Tungsten. This is because I use regular non-fluorescent bulbs, which have a yellow/orange cast. Also known as warm white! Lovely in rooms, not so much in photos.

This setting produced an improved color temperature over the indoor setting, so I shut off the lights on my lightbox and was about to upload the pictures...
And then it occurred to me that perhaps I should try shooting without my lights on at all. It's pretty bright here in Phoenix, and the open side of my lightbox faces 1/2 a wall of glass, so it was worth a shot.

Bingo. The color temperature looked considerably more neutral on Indoor with the lights off than it did on program with the lights on. So, I cranked up my light balance (the +/- button) to +1.5 and...
Bam!

All I had to do at that point was up the contrast a bit to get that perfect white, and use a big white paintbrush to remove the darker areas around the edges of the picture, to arrive at the final image:

So there you have it... a brilliant white background and all I had to do was turn off the stinking lights. Who'da thunk it? Okay probably everyone else but every now and then I'm not as bright as I pretend to be ;)
So, here are all of the pics side by side so you can see the startling differences!

Hope this helps!!
Next installment will be about ... WHY IS THERE GLITTER IN MY ICED TEA? Oh, sorry. Noticed some glitter in mah tea. Risk of that craft that I do. Anyway,
We'll be talking about macros and cropping. Or, "How to make the focal point feel like it is at a natural place in the photo so the viewer's eyes don't go buggy" It matters more than it seems like it should!
<3
Amber
Saturday, June 4, 2011
Finding Your Voice in Jewelry Making

This is a valuable process that you can harness to find your own unique vision regardless of which art you work in. As jewelry designers, there is a somewhat standard way to work as you learn, in putting various beads, chains and findings together to create your work.
To broaden your knowledge and abilities, seek out artists on Etsy whose work you admire. Try to recreate what they've done - this is a tried and true method passed down from renaissance artists. Before an artist became a master in their own right, they worked as an apprentice to a master, duplicating the master's work and even doing some of the underpainting work for the master's finished pieces. Through this practice the understudy learned the technique well enough that when they were ready they could go and do their own unique work while drawing from what they had learned.
The key is to imitate other artists only to the point that you are learning new techniques - do not strive to replicate the work of another artisan alone, learn from many and continue to do so even after you've mastered many techniques. As you work you will be able to incorporate the lessons you've learned into your own unique style that speaks from your heart.
As always, create what you love and is beautiful to you, and never stop learning!
Amber
Subscribe to:
Posts (Atom)